How to Flip Slides in PowerPoint for Translation to Right-to-Left Text
in PowerPoint Tips on June 21, 2025Need to switch your PowerPoint slides from a left-to-right layout to a right-to-left format for languages like Arabic, Hebrew, or others? PowerPoint offers flexible tools to help you customize and format your presentations with ease. When translating content from English into a right-to-left language, it’s essential to adjust the slide layout to match the proper reading direction. This step-by-step guide will help you optimize your PowerPoint slides for right-to-left languages such as Arabic, Hebrew, Persian (Farsi), Urdu, Kurdish, Syriac, and more—including Aramaic, Azeri, Divehi, Fula, N’Ko, and Rohingya.
In addition to repositioning the text direction, steps also need to be taken to flip the other PowerPoint slide layout for example tables, charts, logos etc.
This blog post provides the steps for how to flip slides in PowerPoint manually, so that the text and objects orientation aligns with RTL languages (plus the PPT Productivity Flip Slides feature preview at the end).
Note that these steps are relevant for situations when using an existing PowerPoint presentation written in a left-to-right text format, to rearrange the text and objects such as charts and tables for translation to a right-to-left text language (or conversely from a right-to-left written language to a left-to-right written language).
Step 1: Open the PowerPoint Presentation
Start by opening your existing PowerPoint presentation that contains the slide you want to flip. For this guide we are assuming that you have an existing presentation written in English or another left-to-right format and you are planning to flip the layout for translation to a right-to-left language.
Note – it’s a good idea to save a separate copy of your presentation before making changes, so you can refer back to the original as you make updates.
Step 2: Change Text Direction and Text Alignment in PowerPoint for right to left layout
To change PowerPoint text direction and alignment:
- Select the Text Boxes you want to change – click on each text box on the PowerPoint slide. You can hold down the Ctrl key while clicking to select multiple text boxes at once.
- Go to the Home tab on the PowerPoint ribbon and from the Paragraph group, click the expansion button to access the paragraph popup menu for Indents and spacing. While in this popup menu you can change the text direction and alignment:
- To Change Text Direction:
- In the Paragraph group, from the Direction section
- Select Right-to-Left radio button
- Your text should all now be aligned to the right, and in a right-to-left arrangement.
- To change Text alignment:
- From the Alignment drop down, select the Right option, to align the text to the right.
- Then click ok to apply the updates
- To Change Text Direction:

Step 3: Review bullet points
Bullet points on your PowerPoint slide should automatically be flipped to align to right when you change your text direction and alignment, however we recommend reviewing your bullet points to ensure this is the case. You may need to adjust your bullet point indentation levels, under the Paragraph settings.
Step 4: Flip PowerPoint Slide Elements
To flip other elements in PowerPoint slides for reading right to left, you need to be selective. Here is our recommendation for the most commonly used elements:
4.1 Frameworks or drawn objects can be flipped via rotation:
Frameworks or drawn objects that are purely ornamental might not need to be flipped at all – they may need to simply be repositioned on the slide. However any framework or drawn object that needs to be read sequentially should be flipped. To do this:
- Select All Elements – Click and drag to select all the elements on the slide (text boxes, images, shapes, etc.).
- Go to the Shape Format tab (this tab appears on the PowerPoint Ribbon when you select shapes or images).
- In the Arrange group, click on Rotate > Flip Horizontal
- Tip: if you are selecting numerous shapes that need to be flipped together, grouping the shapes before flipping them will allow you to mirror the original arrangement (if you do not group the individual shapes, each will flip separately and it may seem that nothing has changed).
4.2 PowerPoint Charts can be flipped by editing the Chart format
Some PowerPoint chart layouts can be flipped, but not by using the flip or rotate feature. To reverse the display of charts in PowerPoint for right to left language, you need to change attributes of the chart.
In this example shown below we have used a PowerPoint bar chart example. To flip a PowerPoint bar chart display, select the horizontal axis of the chart and right click, then select ‘Format Axis’ (refer to the diagram below for guidance).
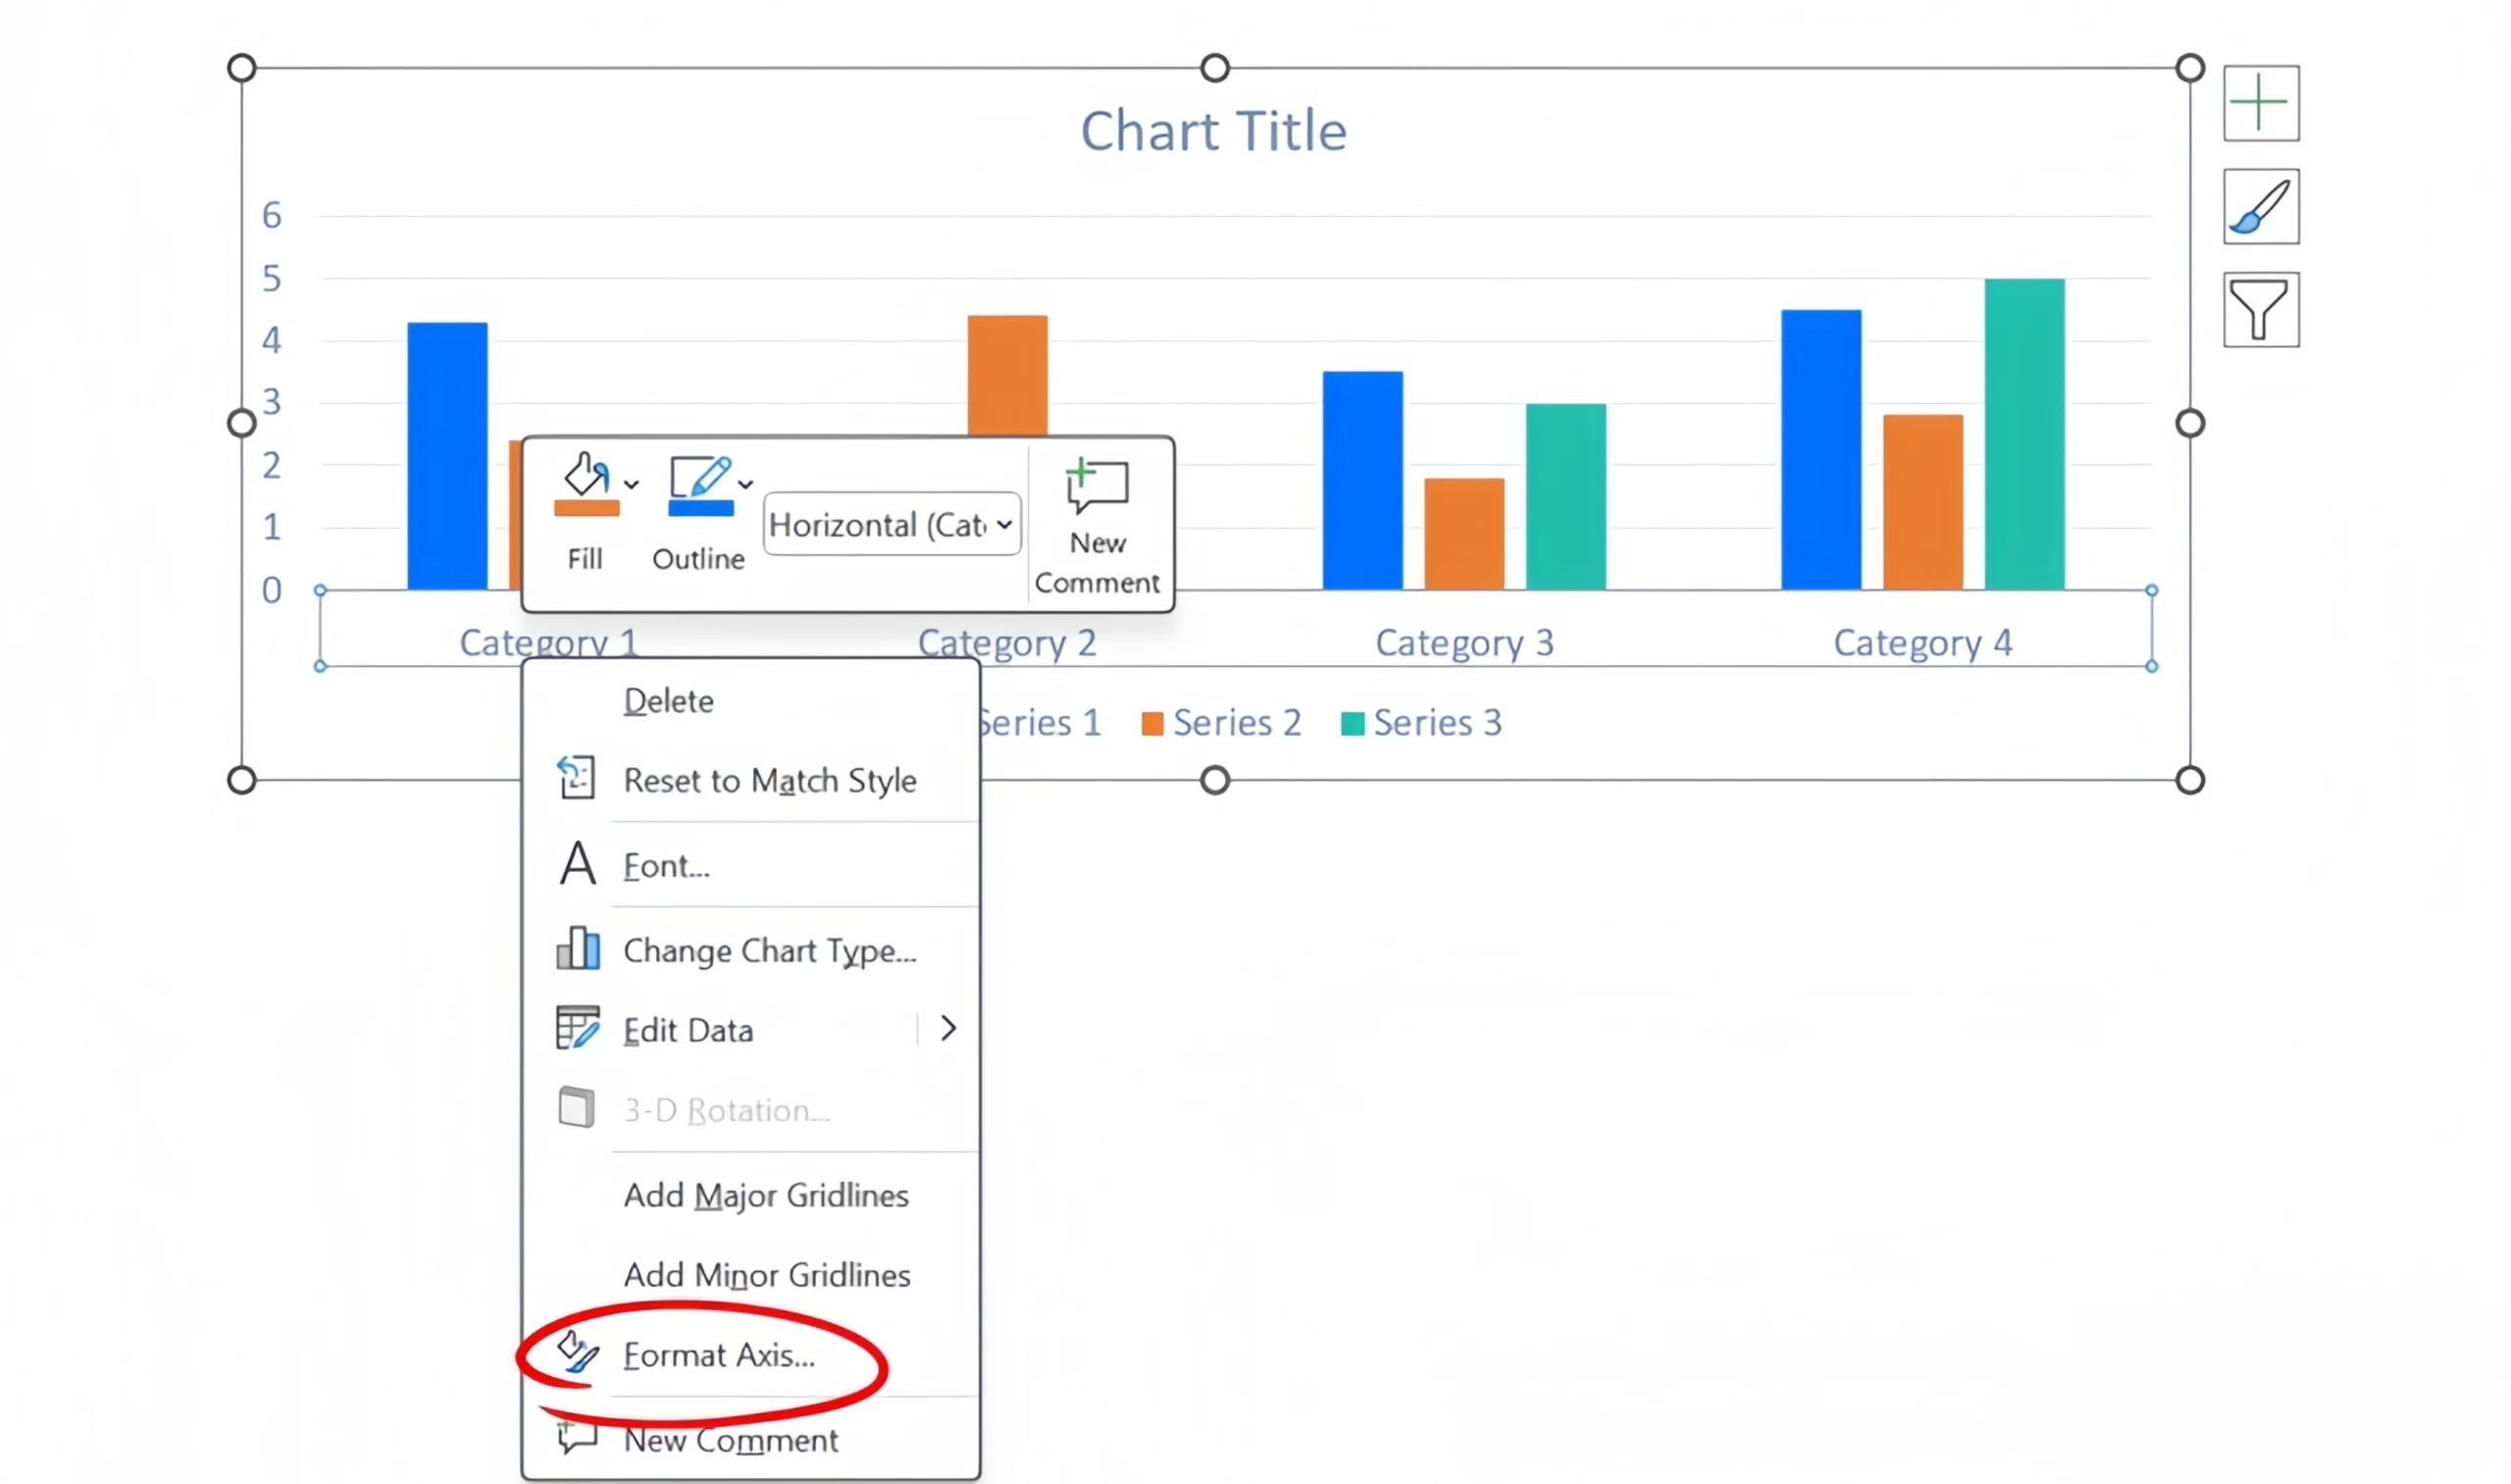
From the Format Axis popup that appears to the right of screen, select Axis Options and then check the checkbox for ‘Categories in reverse order‘.

Once the Categories in reverse order option is checked, your PowerPoint bar chart content and categories should be updated and display from right to left. The Y axis should also have been moved to the right hand side (refer screenshot example below of a bar chart that has been flipped).

Note however that the Series order does not get updated automatically. You will need to manually rearrange the Series display to be in right to left format (if the series should read sequentially – e.g. this would be important for years or months).
4.3 PowerPoint tables need to be manually rearranged
If you want to flip PowerPoint tables, it these need to be manually rearranged so that the columns are reversed in order.
Rearranging table columns in PowerPoint can get confusing! To avoid confusion, we recommend copying the entire table, moving the copy of the table to the side of the slide as a reference and making the changes in the original table on the slide, so that you can refer back to the original version of the table and ensure you have repositioned all columns correctly. Once you have completed the column repositioning, you can delete the backup copy of the table.
Step 5: Adjust and Reposition Elements in PowerPoint
After flipping the elements, you may need to manually adjust and reposition them to ensure a cohesive and visually appealing layout. Here are some tips:
- Align Shapes and Images: Ensure that PowerPoint shapes and images are properly aligned with the new right-to-left orientation.
- Reposition Text Boxes: Move PowerPoint text boxes to their appropriate locations to maintain the logical flow of information.
- Resize Elements: Resize elements if necessary to fit the new layout.
- Rearrange (but don’t flip) Images and logos: Remember not to flip objects such as images or logos. These should just be repositioned based on the new PowerPoint slide layout (e.g. relocated to the left or right, depending on their original position).
Step 6: Update PowerPoint Master Slide (if applicable)
If you are using a consistent PowerPoint template or master slide, you can also edit the layout of the PowerPoint master slide. To do this:
- Go to the View tab on the PowerPoint Ribbon.
- Click on Slide Master.
- Follow the same steps to flip and adjust the elements on the master PowerPoint slide.
- Close the Master Slide view once you have finished
Step 7: Enable PowerPoint language options
In order to be able to write PowerPoint slides in a right-to-left language for the translation step, you need to enable the Windows keyboard language for the specific right-to-left language you plan to use.
To add an input language, in PowerPoint navigate to File > Options > Language. It’s important to note that you can set the display and authoring languages in PowerPoint separately. This means for example that while your PowerPoint setup, ribbons and information can be in English, you can use a different language for authoring content.
Step 8: Translate Text from English to your right to left language
Once your layout is adjusted, proceed with translating the text from English to the right to left language you are translating to. If you are not proficient in the language, we recommend using high quality translation services or working with a professional translator to ensure accuracy, rather than relying on google translate or other online auto translate services.
Step 9: Review and Finalize Your PowerPoint Presentation
- Proofread: Ensure that all text is correctly translated and properly aligned.
- Check Formatting: Double-check the formatting of all elements to ensure consistency and readability.
Flipping a PowerPoint slide from a left-to-right to a right-to-left layout involves changing text direction, aligning text, flipping elements, and repositioning them appropriately. By following these steps, you can effectively prepare your slides for translation into a right to left reading language, ensuring a professional and polished presentation.