Curving text in PowerPoint is a great way to design circular logos, highlight titles, or add a creative touch to your slides. In this blog post, we’ll walk you through several methods to curve text effectively in PowerPoint.
Method 1: Curve Text in PowerPoint using Text Effects
Step 1. Insert a Text Box or WordArt
- Open your PowerPoint presentation.
- Go to the Insert tab.
- Select Text Box or WordArt from the Text section.
- Click on the slide to place the text box or WordArt, and type in your desired text.
Step 2. Apply Text Effects
PowerPoint for PC:
- Select the text box or WordArt on your PowerPoint slide.
- Go to the Format tab on the PowerPoint ribbon (or Shape Format tab if using WordArt).
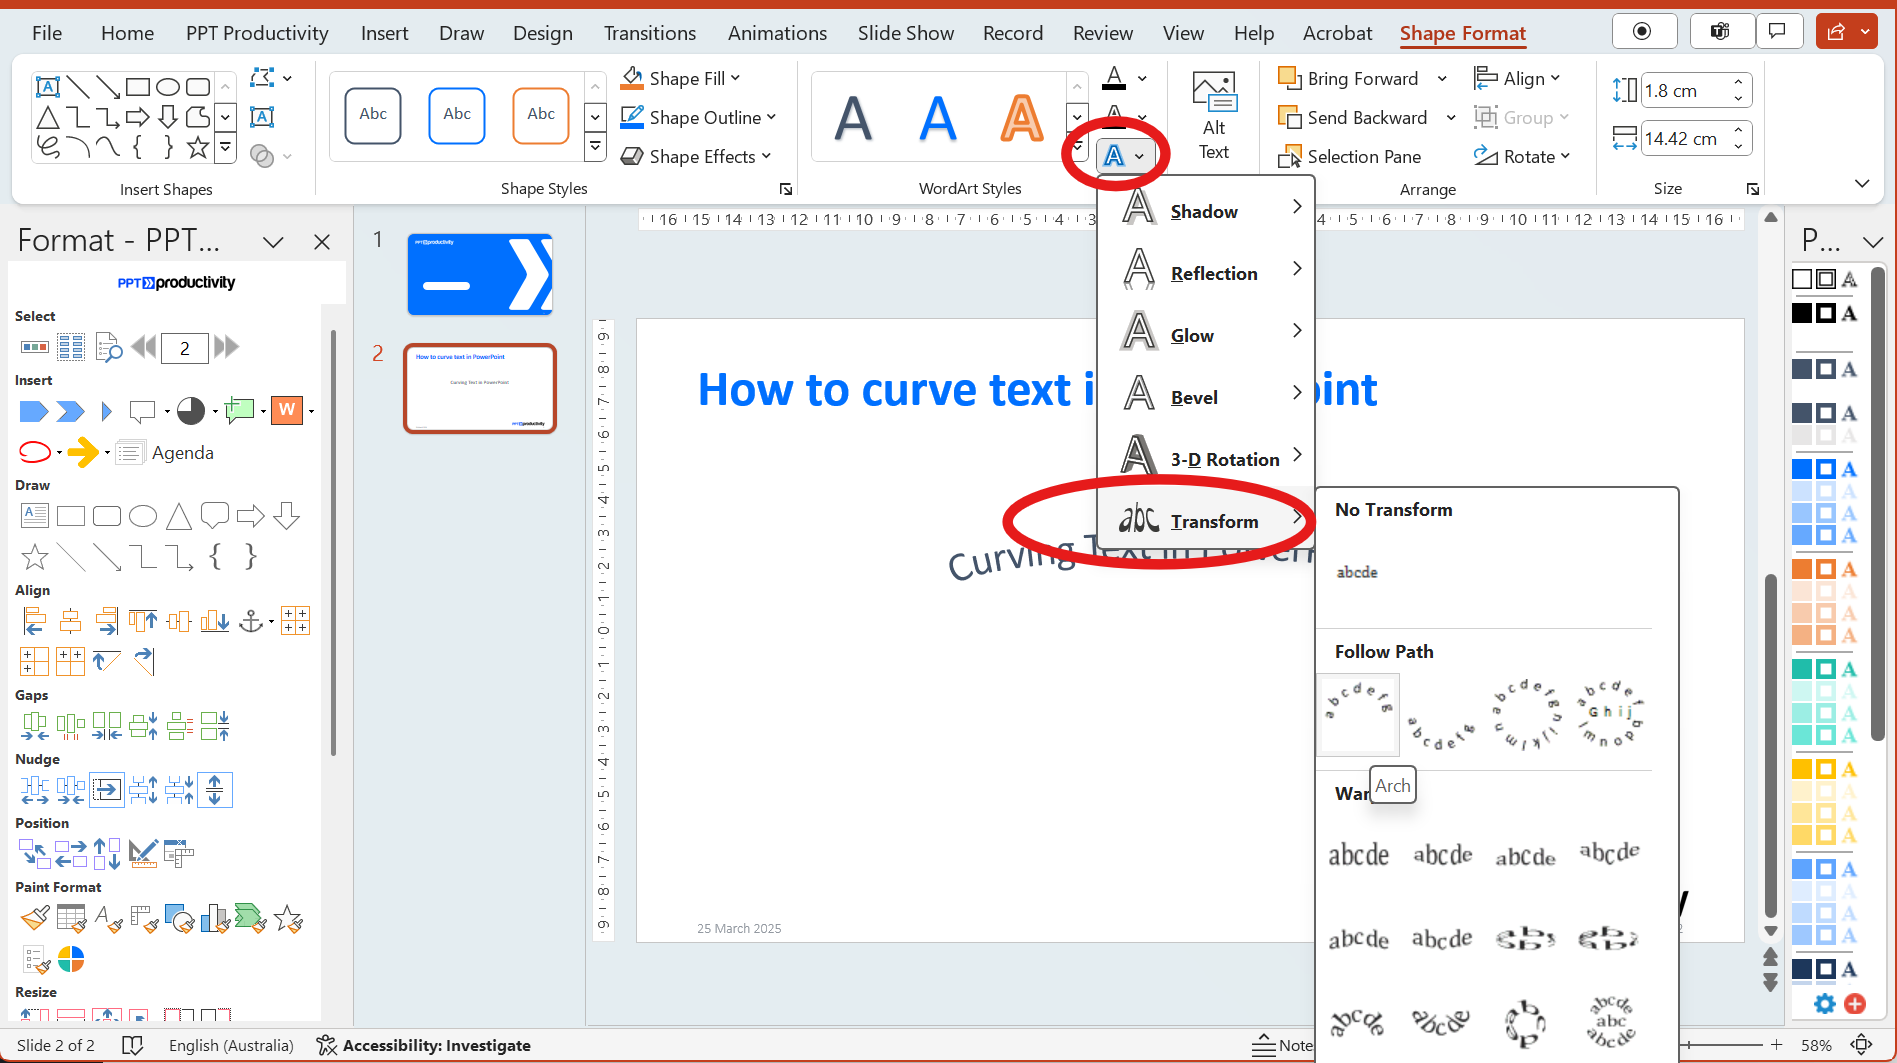
- Click on Text Effects in the WordArt Styles group.
- Hover over Transform to see the available options.
- Choose a curve style from the Follow Path section, such as Arch Up or Arch Down.

PowerPoint for Mac:
- Select the text box or WordArt on your PowerPoint slide.
- Go to the Shape Format tab on the PowerPoint ribbon.
- Click on Text Effects.
- Hover over Transform and select a curve style from the Follow Path section.
Method 2: Curve Text in PowerPoint using Shapes
1. Insert a Shape
- Go to the Insert tab on the PowerPoint ribbon.
- Select Shapes and choose a circular shape (e.g., Oval).
- Draw the shape on your PowerPoint slide.
2. Add Text to the Shape
- Right-click the shape and select Add Text.
- Type your desired text inside the shape.
- Adjust the font size and style as needed.
3. Curve the Text
- Select the shape with the text.
- Go to the Format tab (or Shape Format tab).
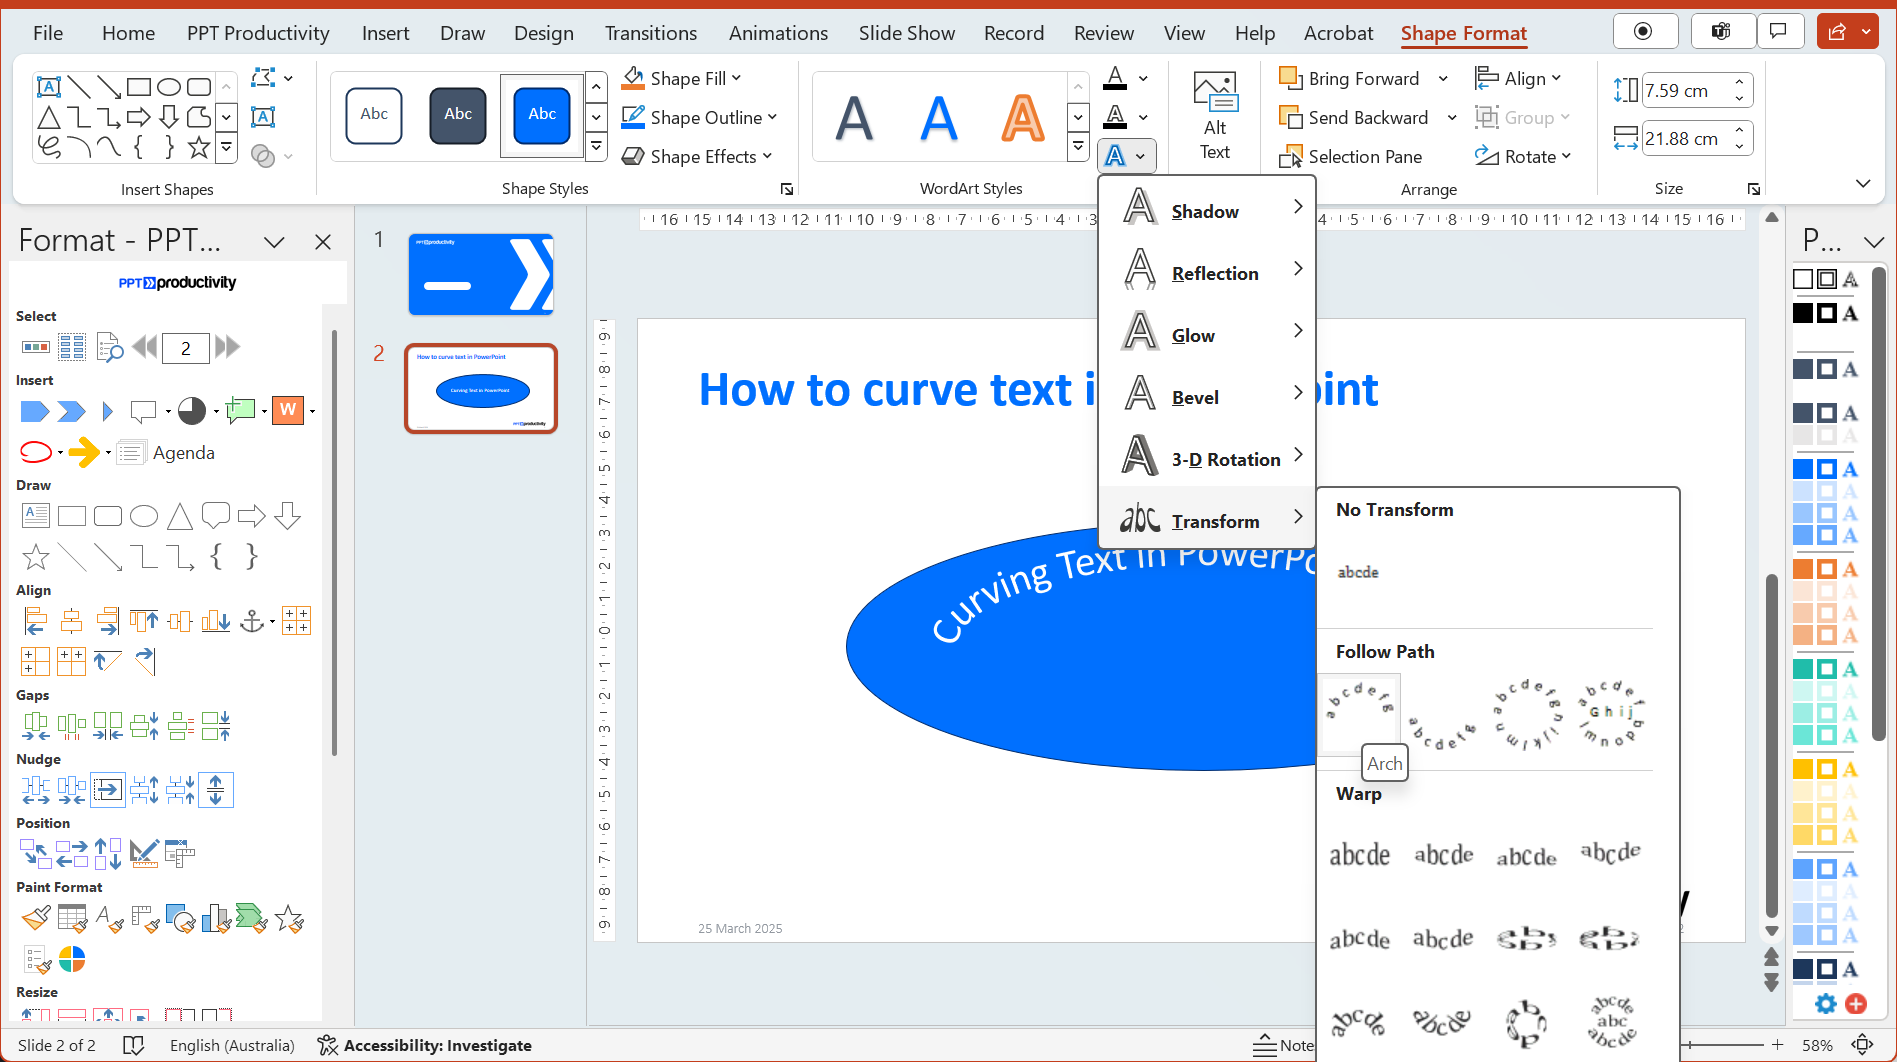
- Click on Text Effects.
- Hover over Transform and choose a curve style from the Follow Path section. The Follow Path options will curve the text to follow a similar curvature to the shape containing the text

Troubleshooting Tips for Curving text in PowerPoint
- Text Not Curving Correctly in PowerPoint:
- Ensure you have selected the correct text box or WordArt.
- Check that you are using the Transform options under Text Effects.
- Text Overlapping or Misaligned:
- Adjust the size of the text box or shape.
- Use the Yellow Handle to fine-tune the curvature and spacing of the text.
- Text Not Displaying Properly:
- Verify that your PowerPoint version supports the text effects you are trying to use.
- Update PowerPoint to the latest version if necessary.
We hope this guide has helped you to curve text in your PowerPoint presentation.
Tips:
GreatPPT’s PowerPoint templates often include pre-designed curved text elements. You can also copy and edit one of these for faster results.
Match font style and color with the template’s theme for a professional finish.
